Overview
For this tutorial you we will use an existing CMSIS compliant project, ready to compile and execute. We will guide you through the main steps towards executing a program on a microcontroller and monitoring it with the μVision debugger.
To get the best out of this tutorial you may decide to download the following support files. In exchange, we will ask you to enter some personal details. To read about how we use your details, click here. On the registration form, you will be asked whether you want us to send you further information concerning other Doulos products and services in the subject area concerned.
Download the files for this tutorial »
Download the required software »
Background Information
In order to familiarize ourselves with the basic operations and files required for the creation of a CMSIS compliant μVision project. We will start with a simple example of an 8 bit counter. In this tutorial, you will be asked to compile and run some existing code.
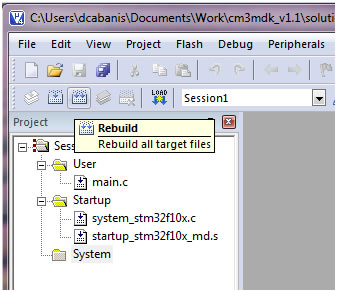
Two files have been added to the project to provide the bare necessities to remain CMSIS compliant. They are:
startup_stm32f10x_md.s : A template file provided by ARM and adapted by the silicon vendor to include interrupt vectors for all device specific interrupt handlers. Each interrupt handler is defined as weak function to a dummy handler. Therefore the interrupt handler can be directly used in application software without any requirement to adapt the <startup_device>.s file.
system_stm32f10x.c : A template file provided by ARM but adapted by the silicon vendor to match their actual device. As a minimum requirement this file must provide a device specific system configuration function (SystemInit) and a global variable that contains the system frequency. It configures the device and initializes typically the oscillator (PLL) that is part of the microcontroller device. The SystemInit() function does not have to be invoked manually since it is called automatically as part of the startup sequence inside the startup_stm32f10x_md.s file.
Actions
- Invoke μVision and navigate to the \intro\session1 directory: File > Open.
- Open the provided project file called session1.uproj.
- Ensure that project session1 is active (highlighted). Otherwise right-click the project name and select: Set as Active Project.

- Select Project > Options and move to the C/C++ tab. Inside the Define entry box, enter the value: STM32F10X_MD.
- Rebuild the project.

- Verify that the Build Output window doesn’t show anything suspicious.
- Start the debugger. Since all target settings have been prepared for you, there is nothing you need to adjust.

- In order to observe the variables you will have to add the local variables window (if not already present).
Select: View > Watch Windows > Locals.
- Execute the program and observe the variables being updated inside the Locals window.
- Notice that after reaching the end of main(), the program doesn’t stop. Instead the program executes a function called _sys_exit() which consists of an infinite loop. To stop executing the loop, you will have to hit the stop button to the right of the run button.
- To the left of the run button is the reset button (RST). You could use it to restart the program.
- When you are done exploring the debug tool, quit the debug session by clicking the same button that got you into the debugger in the first place.
This concludes the first tutorial of the series. In the next tutorial we will look at retargeting C functions to implement our very own semi-hosting solution via the Cortex-M3 ITM.